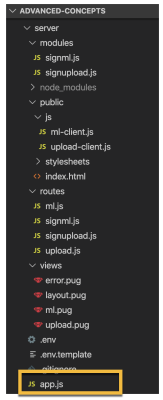
Signing Application
 Edit on GitHub
In order to sign the assets we need to use API_SECRET which should only be access from a backend application. We're going to build a node express server and use the pug templating engine to generate signature on server side rendered pages and APIs that can be accessed from front end applications via AJAX.
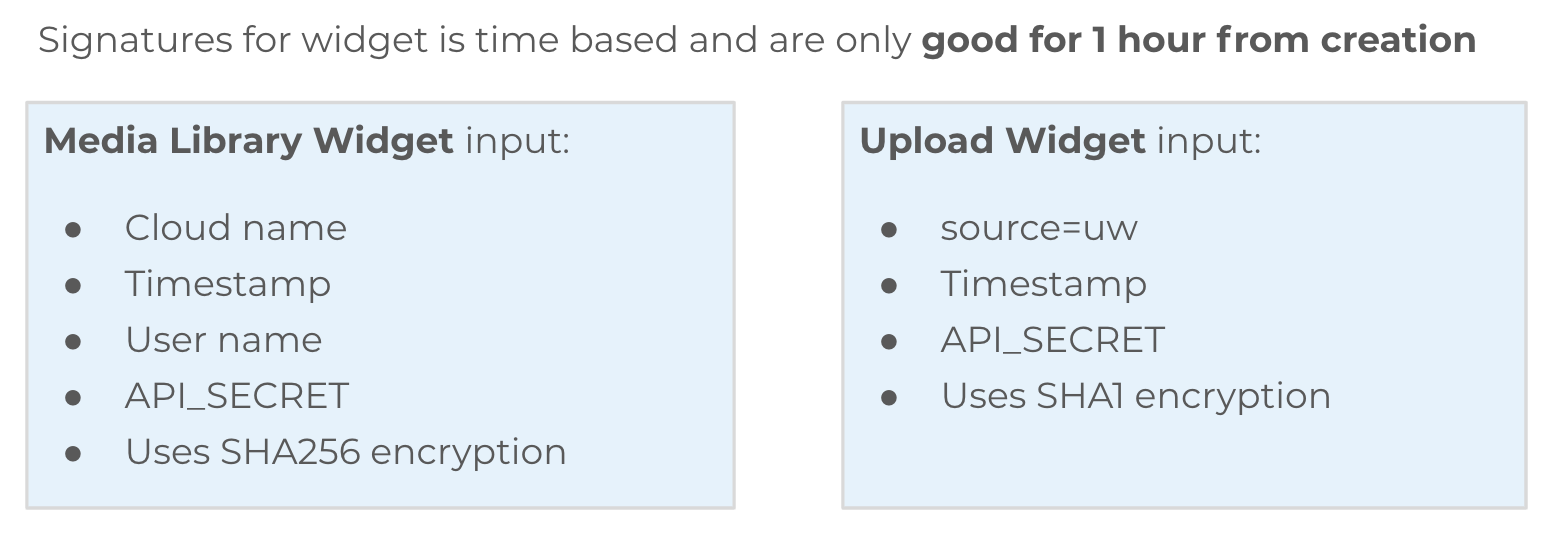
In this app we'll be creating time based signatures. This means that the widgets will only be able to execute for a a period of one hour from the time the signature was created. Note that the media library widget offers many options that can change the experience. In this module we are signing the widget such that the user has full access as if they were using the media library when signed into the DAM.
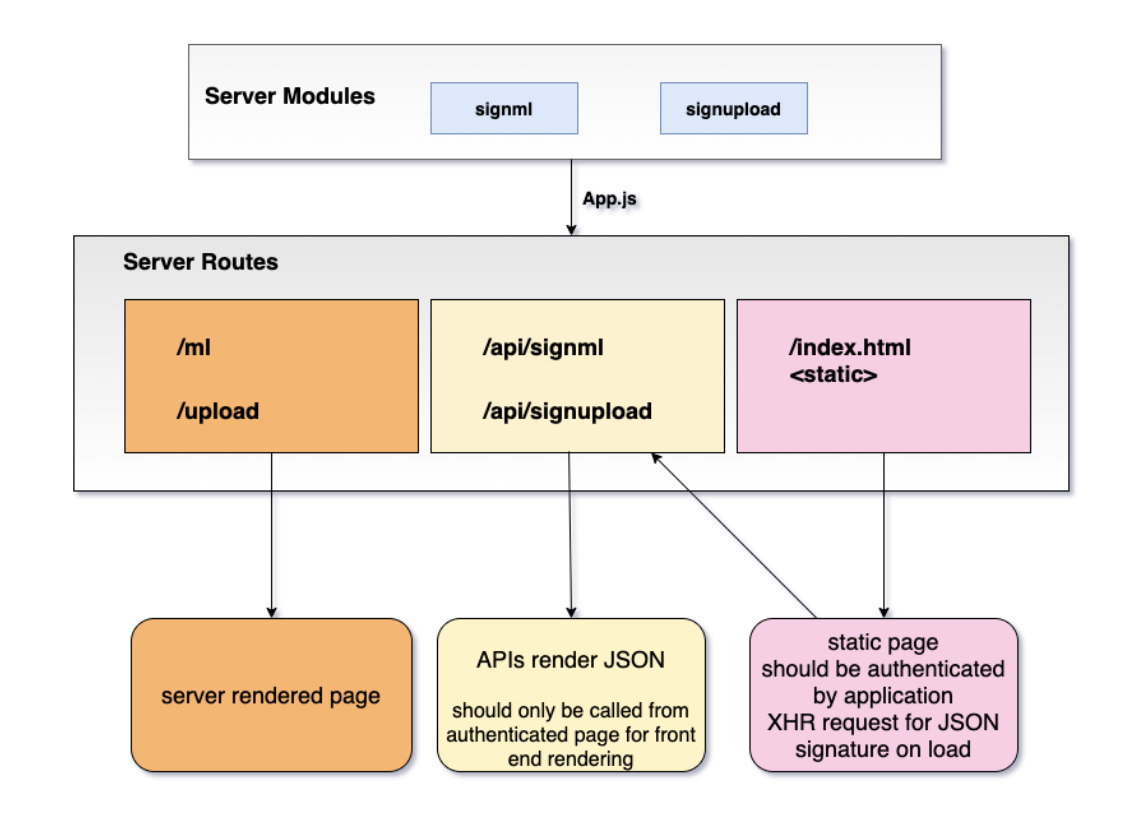
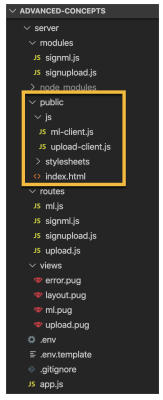
Signing Application Architecture
Exercise: Server Routes
Let's start by looking at the routes. In order to test these out, you'll need to get your local server running. Start by copying your .env file from the root of the project into the signing-widgets/server directory.
cp .env signing-widgets/servercd signing-widgets/servernode app.js
Open in browser: http://localhost:3000
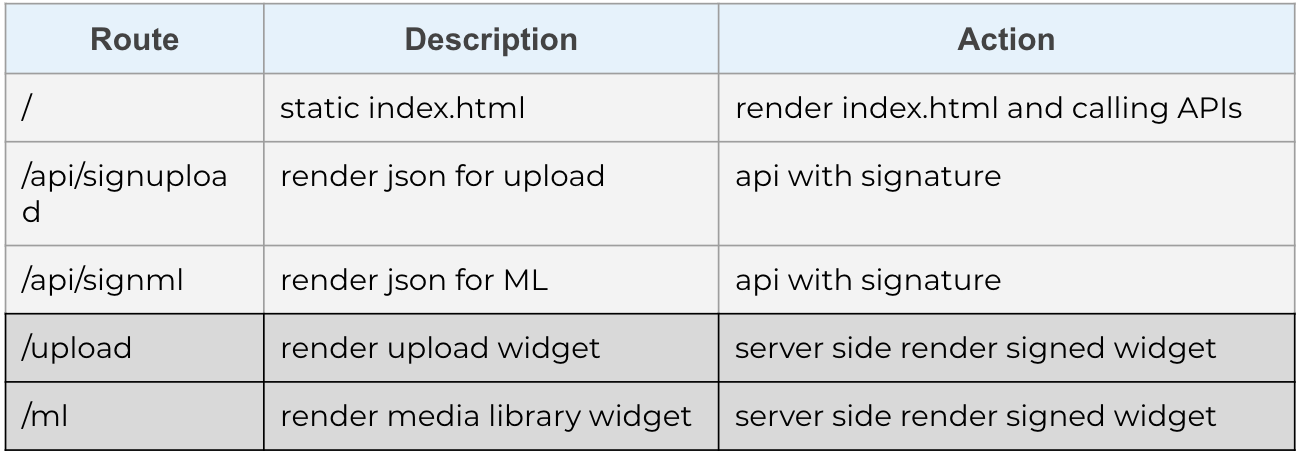
Now try out the routes listed below.
Comparing Backend and Frontend Inputs for the Two Widgets
We've seen when looking at the code for unsigned widgets that there are similarities between these widgets. As we move into looking at code for the signed widgets, let compare the inputs for each of the widgets from the perspective of backend and frontend.
Using the server we'll be supplying both front end and backend inputs. For the Server Side rendering we'll render both via our templating engine. For the API, we'll render a static HTML page with the client scripts that make AJAX calls to the APIs to get the inputs supplied by the signing module and the CLOUDINARY_URL.
Back End Inputs
Front End Inputs
Server Code Walkthrough
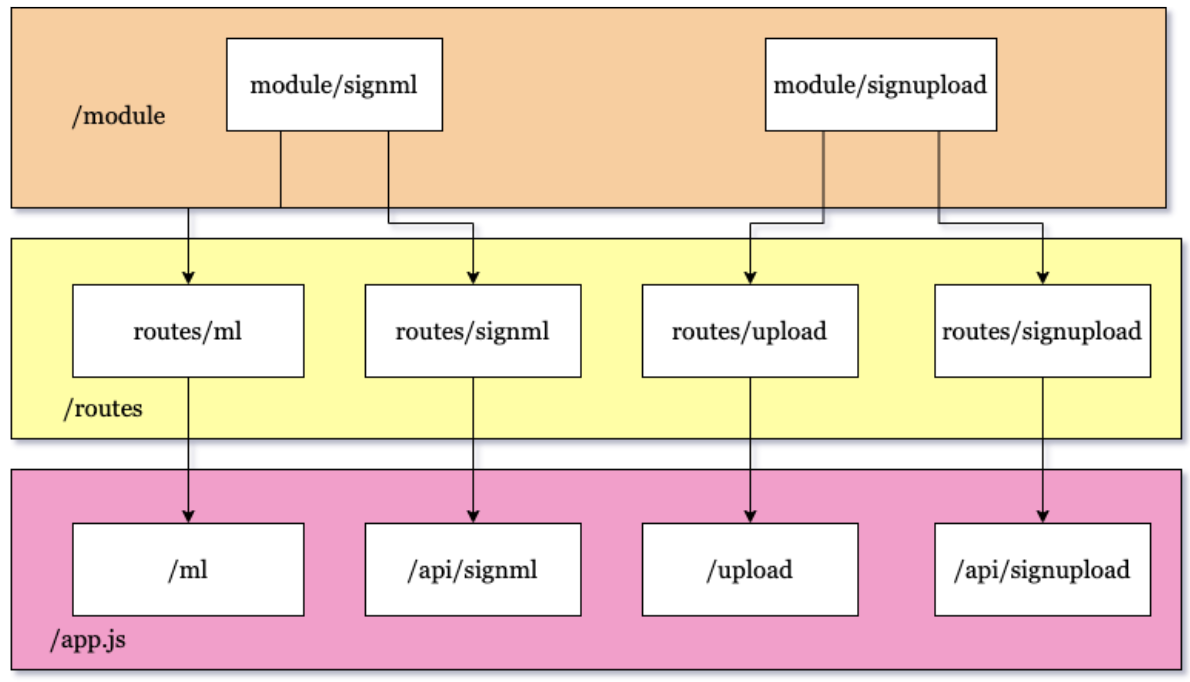
We'll view the code that renders signatures in three layers, starting at the bottom with app.js, moving up through the /routes and ending at the module layer where the timestamps and signatures are actually calculated. Then we'll look at the static index.html and see how to make AJAX calls to the server APIs to get the signatures for a front end example.
app.js
Starting with app.js, look at how we designate the routing we've experimented with.
First we load the routing code.
const mlRouter = require('./routes/ml')const uploadRouter = require('./routes/upload')const signmedialibRouter = require('./routes/signml')const signuploadRouter = require('./routes/signupload')
Then we map the URI to the route.
app.use('/ml', mlRouter)app.use('/upload', uploadRouter)app.use('/api/signml', signmedialibRouter)app.use('/api/signupload', signuploadRouter)
We tell express to look for views in the views directory and set up the pug templating engine.
app.set('views', path.join(__dirname, 'views'))app.set('view engine', 'pug')
We tell express to serve static files from the public directory.
app.use(express.static('public'))
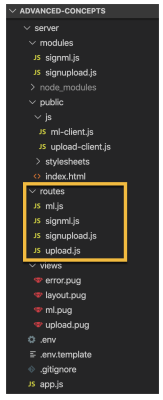
routes
Note: These routes should be served from authenticate pages since they provide signatures for widgets that allow the cloud to be changed.
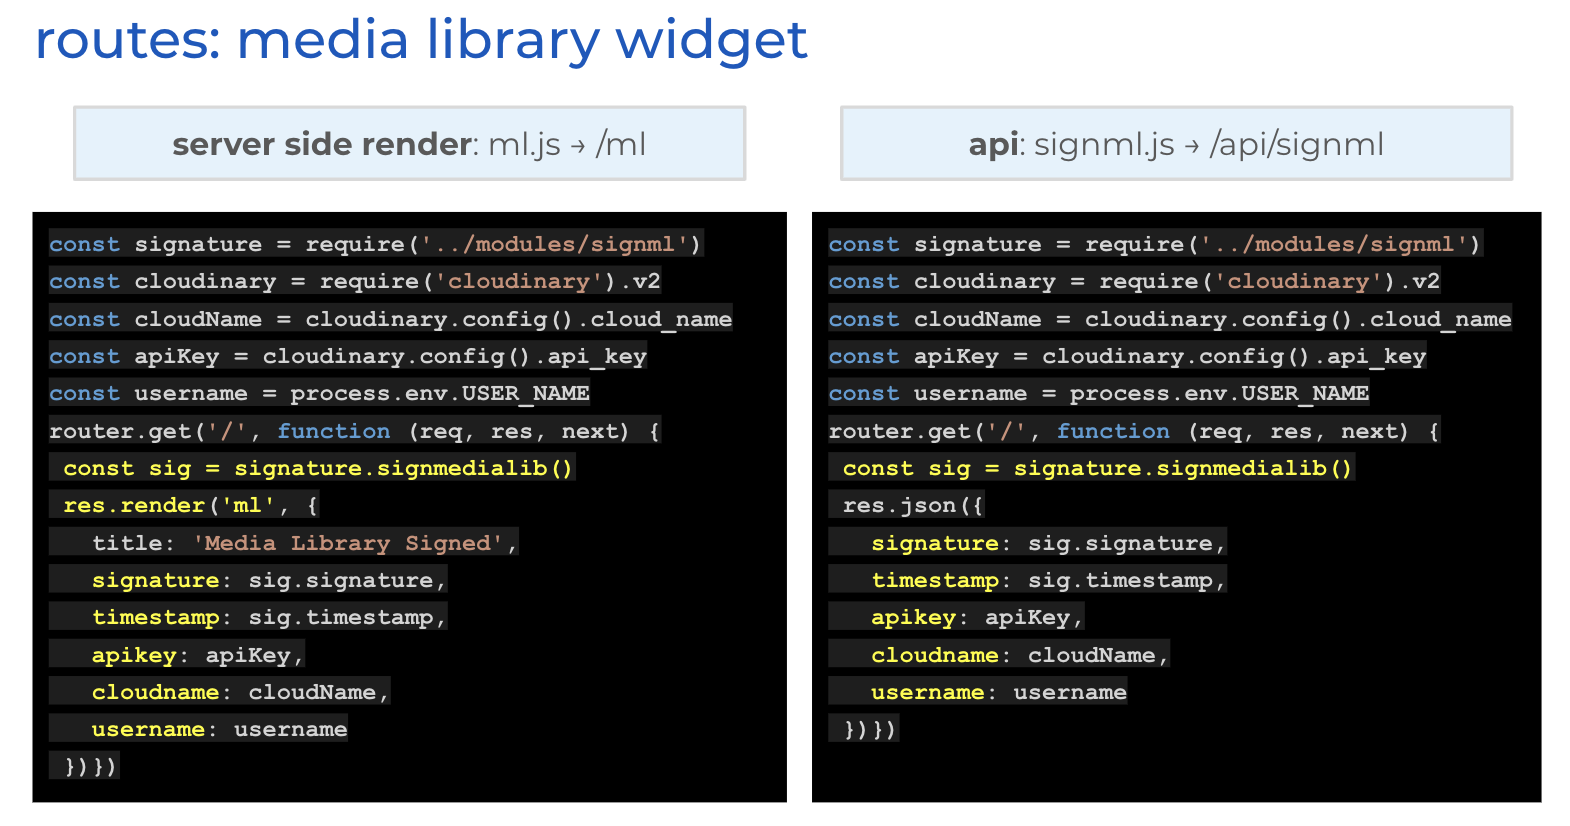
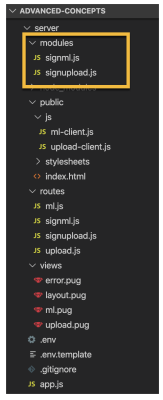
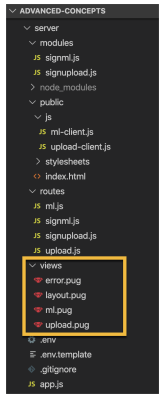
Moving up to the routes dirextory, you'll find 4 routes: ml and upload are the server side rendered pages and signml and signupload are the APIs.
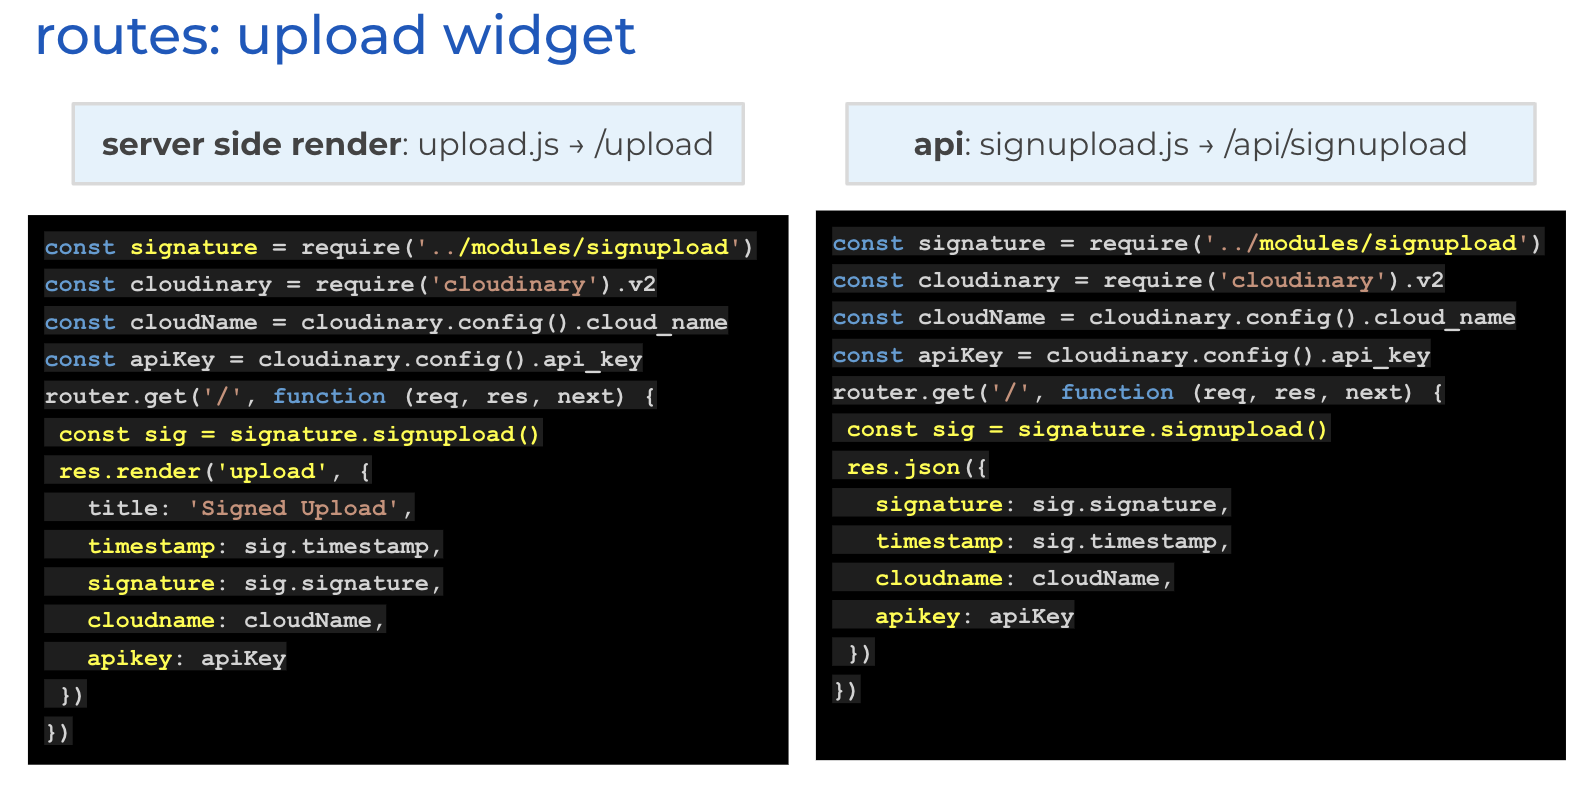
Upload Widget Routes
Compare the routes used for the upload widget to render a page with signed widgets versus rendering JSON with the signature an other data needed by the front end. one of the main differences is that the server side page uses a res.render while the API uses a res.json. Both of these routes use the same module to get the signature and timestamp. The rendering route passes data off to the pug engine to produce a web page response, while the API route passes data back to the project as JSON.
Media Library Widget Routes
Compare the routes used for the media library widget to render a page with signed widgets versus rendering JSON with the signature an other data needed by the front end. one of the main differences is that the server side page uses a res.render while the API uses a res.json. Both of these routes use the same module to get the signature and timestamp. The rendering route passes data off to the pug engine to produce a web page response, while the API route passes data back to the project as JSON.
modules
The actual creation of the signatures occurs in the module layer. First a timestamp is generated because widget signatures are time scoped to one hour. A "string to sign" is created based on verification requirements. Then the string is hashed using one of the encryption algorithms. The SHA1 encrypted string is UTF8 encoded.
We're coding different modules for each of the widgets because they have different back end and front end inputs.
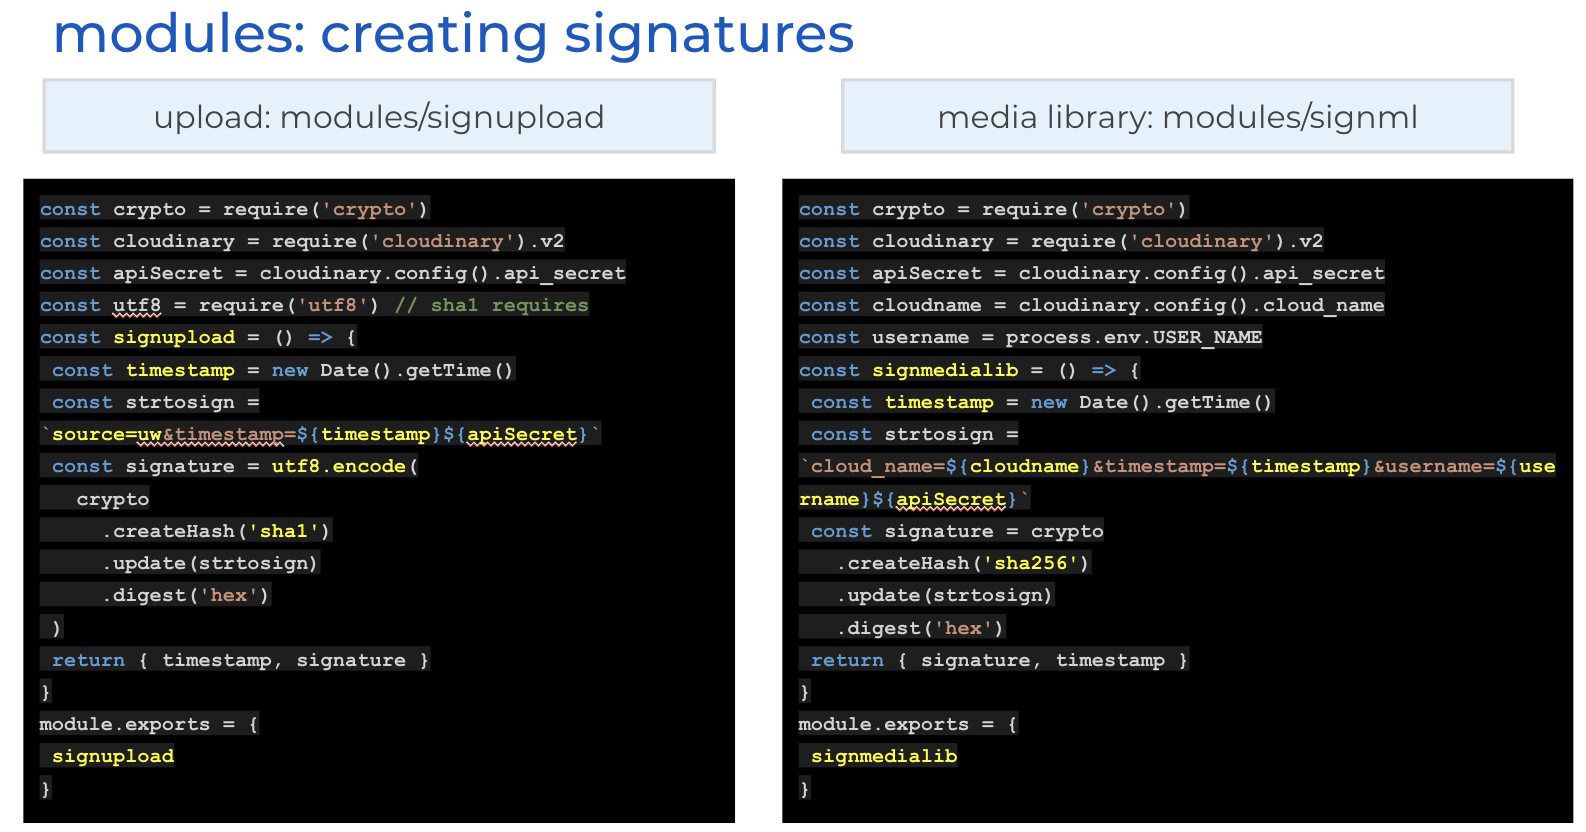
Each module grabs the data it needs from CLOUDINARY_URL and the USER_NAME environment variable. Then it generates the data needed by the front end and returns is as an object.
views
When rendering the views we start with layout.pug and then extend that layout to create the media library page with ml.pug and the upload page with upload.pug.
layout.pug
The layout is setting up script tags to pull in the libraries from CDNs. It also renders a navigation bar and media library widget is rendered to the home page while upload widget has it's own page.
doctype htmlhtmlheadtitle= titlelink(rel='stylesheet', href='/stylesheets/style.css')script(src='https://widget.cloudinary.com/v2.0/global/all.js' type="text/javascript")script(src='https://media-library.cloudinary.com/global/all.js' type="text/javascript")bodyul.navli: a(href='/ml') Homeli: a(href='/upload') Uploadblock content
ml.pug
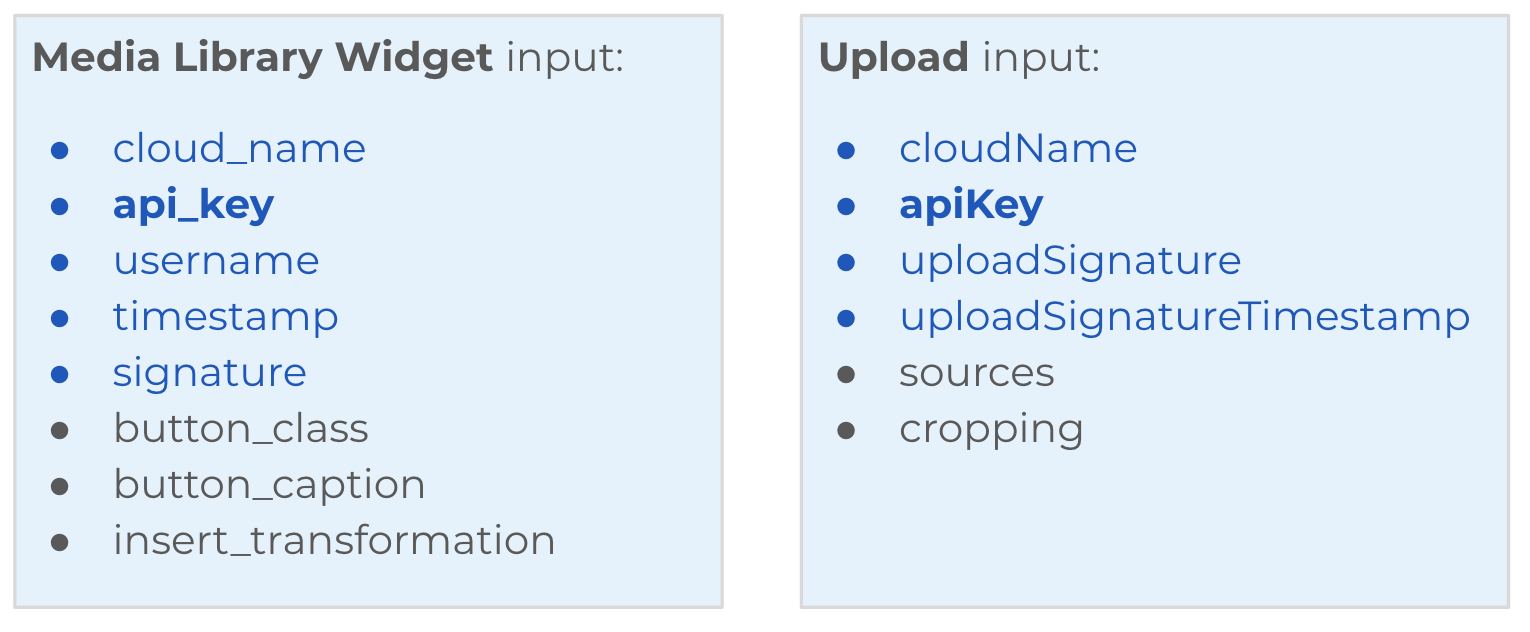
The script for rendering the Media Library widget should look a little familar - somewhat like the unsigned widget, but the inputs include signature and timestamp.
extends layoutblock contenth1= titlep Welcome to #{title}p Timestamp: #{timestamp}p Signature: #{signature}divbutton#ml-buttonscript(type="text/javascript").document.addEventListener("DOMContentLoaded",e => {const options = {cloud_name: "#{cloudname}",api_key: "#{apikey}",username: "#{username}",timestamp: "#{timestamp}",signature: "#{signature}",button_class: "ml-btn",button_caption: "Open Media Library",insert_transformation: true}const insertHandler = data => {data.assets.forEach(asset =>console.log('Inserted asset:', JSON.stringify(asset, null, 1)))}window.cloudinary.createMediaLibrary(options,insertHandler,'#ml-button')})
upload.pug
The upload widget page extends the layout like the media library page. It renders the necessary HTML and JavaScript to create the upload widget, along with the data needed as input, which includes the signature and timestamp.
extends layoutblock contenth1= titleh2 Welcome to #{title}p Timestamp: #{timestamp}p Signature: #{signature}divbutton#upload_widget.cloudinary-button Upload filesdivimg#uploadedscript(type="text/javascript").document.addEventListener("DOMContentLoaded",e => {const options = {cloudName: "#{cloudname}",apiKey: "#{apikey}",uploadSignatureTimestamp: "#{timestamp}",uploadSignature: "#{signature}",cropping: false};const processResults = (error, result) => {if (!error && result && result.event === 'success') {console.log(result)document.querySelector('#uploaded').src = result.info.secure_url}}const myWidget = window.cloudinary.createUploadWidget(options,processResults)document.getElementById('upload_widget').addEventListener('click', () => myWidget.open(), false)})
static page with AJAX client calling API
Finally we look at rendering the static page and using fetch to make AJAX calls to the server APIs. The public/index.html should look something like the unsigned index.html that we saw at the beginning of this module. The public folder contains the the client scripts ml-client and upload-client that contain the code to get fetch the date from the APIs and create the widgets.
index.html
<h2>Upload Widget</h2><div><button id="upload_widget" class="cloudinary-button">Upload files</button></div><div><img id="uploaded" /></div><h2>Media Library Widget</h2><div><button id="ml-button"></button></div><script src="https://widget.cloudinary.com/v2.0/global/all.js" type="text/javascript"></script><script src="https://media-library.cloudinary.com/global/all.js" type="text/javascript"> </script><script src="./js/upload-client.js" type="text/javascript"></script><script src="./js/ml-client.js" type="text/javascript"></script>
upload-client.js
document.addEventListener('DOMContentLoaded', async () => {const response = await fetch('/api/signupload')const data = await response.json()const options = {cloudName: data.cloudname,apiKey: data.apikey,uploadSignatureTimestamp: data.timestamp,uploadSignature: data.signature,cropping: false}const processResults = (error, result) => {if (!error && result && result.event === 'success') {console.log(result)document.querySelector('#uploaded').src = result.info.secure_url}}const myWidget = window.cloudinary.createUploadWidget(options,processResults)document.getElementById('upload_widget').addEventListener('click', () => myWidget.open(), false)})
ml-client.js
document.addEventListener('DOMContentLoaded', async () => {const response = await fetch('/api/signml')const data = await response.json()const options = {cloud_name: data.cloudname,api_key: data.apikey,username: data.username,timestamp: data.timestamp,signature: data.signature,button_class: 'ml-btn',button_caption: 'Open Media Library',insert_transformation: true}const insertHandler = data => {data.assets.forEach(asset =>console.log('Inserted asset:', JSON.stringify(asset, null, 1)))}window.cloudinary.createMediaLibrary(options,insertHandler,'#ml-button')})