Images with AI
 Edit on GitHub
In this module we focus on using Add-ons that provide AI Services when working with images.
We'll look at solutions for image upload workflows:
- Create image alt attributes from auto tagging
- Upload and Apply Moderation to detect suspected blurry images
- Apply external data to tags and context and use background removal
- Provide moderation after background removal to allow human inspection
Exercise: Creating alt attributes for images
Use case: If you don’t have external data to supply alt attribute during upload, you can create value from your tags, and tags can be created automatically using Amazon Rekognition.
It is alway preferable to create custom alt attributes values. In this solution, we address a case where these values are not available.
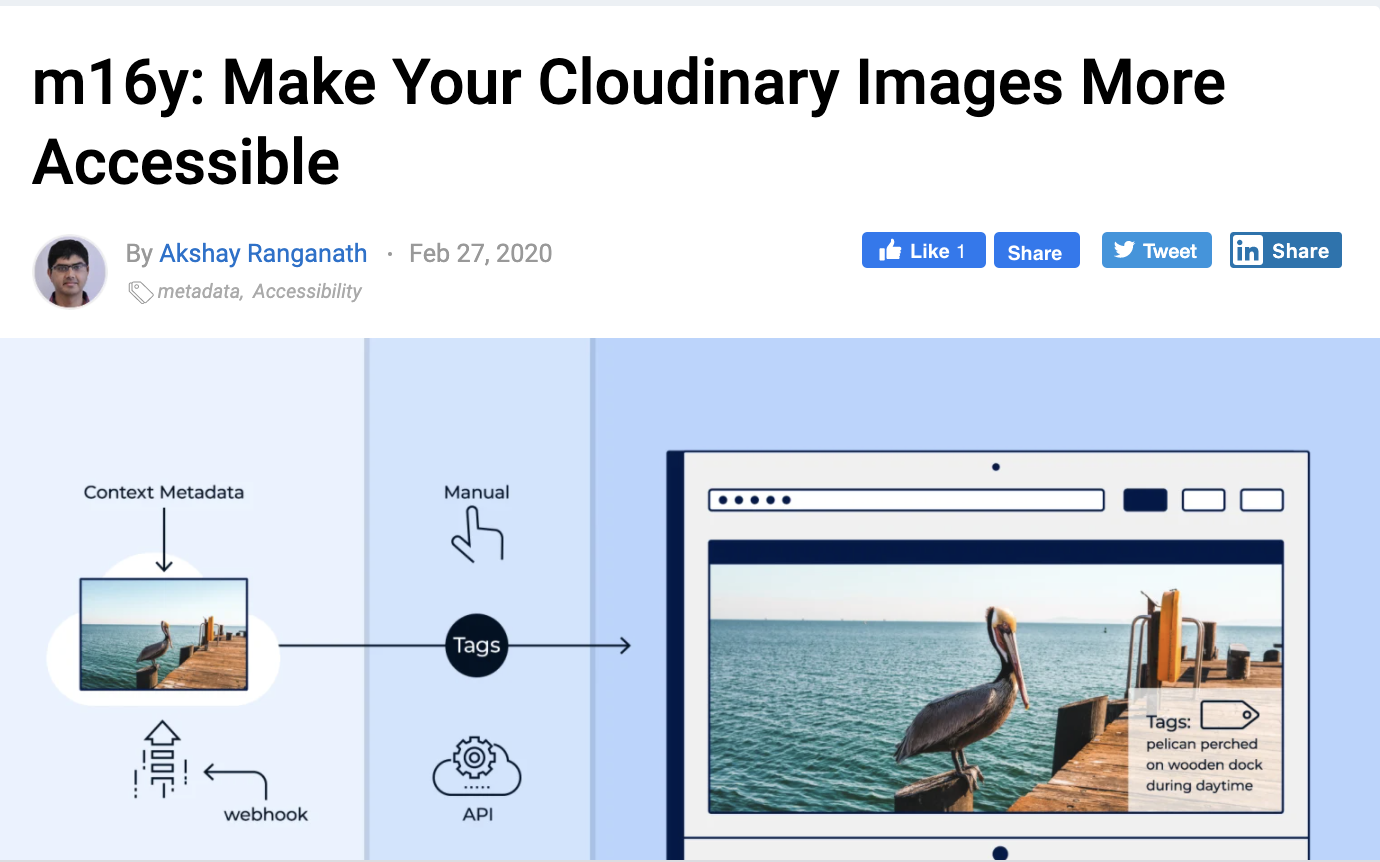
In the Cloudinary Fundamentals for Developer course, we learned to use Amazon Rekognition for tagging. As Web Developers, we know the importance of providing alt attributes for Accessibility. We can now combine tagging with alt attribute creation. This is only one solution for this use case. You can read about other solutions in these blogs:
Making Media Accessible: How to Generate alt Text for Images

m16y: Make Your Cloudinary Images More Accessible
Creating context from tags in response
In a script we can capture the tags assigned to an image and, based on confidence, create a comma separated value for the image alt attribute.
node user-upload-workflow/alt-from-auto-tag/auto-tagging.js
You'll need to activate the Amazon Rekognition Auto Tagging Add-on to run the upload script.
Amazon Recognition Auto Tagging

This script contains 3 sections:
In step 1, we upload the image with a
categorization:option that triggers automatically applying tags based on 85% confidence level by Amazon Rekognition.In step 2, we create an array of tags that have greater than 85% confidence. Then we concatenate all the tags into comma separated string. Then we use
uploader.explicitto update the contextaltvalue with the calculated string.In step 3, we use the
imagehelper to create an image string that uses thealtstring value for the alt attribute.
node user-upload-workflow/alt-from-auto-tag/auto-tagging.js
require('dotenv').config()const cloudinary = require('cloudinary').v2//step 1cloudinary.uploader.upload('assets/images/shell.jpg', {public_id: 'shell',categorization: 'aws_rek_tagging',auto_tagging: 0.85}).then(uploadResult => {console.log(uploadResult)// console.log(uploadResult.info.categorization.aws_rek_tagging)const rekTags = uploadResult.info.categorization.aws_rek_tagging.data.filter(item => item.confidence > 0.85)const alt = rekTags.map(item => item.tag).join(', ')console.log('rekTags', rekTags)if (rekTags) {// add tags to show up in CL Console// step 2cloudinary.uploader.explicit(uploadResult.public_id, {type: 'upload',context: `alt=${alt}`}).then(result => {console.log(JSON.stringify(result, null, 1))}).catch(error => console.error(error))}// create an image tag using the rektags// step 3console.log('image tag:',cloudinary.image(uploadResult.public_id, {width: '400',crop: 'scale',alt: alt}))}).catch(error => console.error(error))
View alt string in browser
Once you've generated this image tag it can be rendered in a web page.
<imgsrc="http://res.cloudinary.com/cloudinary-training/image/upload/c_scale,w_400/shell"alt="Animal, Invertebrate"width="400"/>
You can disable images on a web page and view any alt tags by accessing this setting in chrome settings: chrome://settings/content/images?search=images.

Now you can see how a screen reader would see the web page.

Be Sure to Turn images back on in chrome if you've done this test!
Quality Moderation
If you’re providing a way for your users to upload images, you may want to moderate for quality. Cloudinary provides an upload parameter for quality analysis.
You can access the quality_analysis.focus value in the response. If it is lower than your threshold, you can use the explicit method to move the image into a pending moderation state.
This is a multi step process, but we can execute it in a single script by adding moderation: manual to the upload.
The image must be fully uploaded before we can test the quality for moderation. This means that the image could be served from Cloudinary before it has been moderated. We'll see in the next section on Video with AI ways to prevent image service until moderation is complete. This exercise would fit a use case with in house moderation requirements, not moderation for uploads from the public.
Execute this script:
node user-upload-workflow/quality-moderation/quality-moderate.js
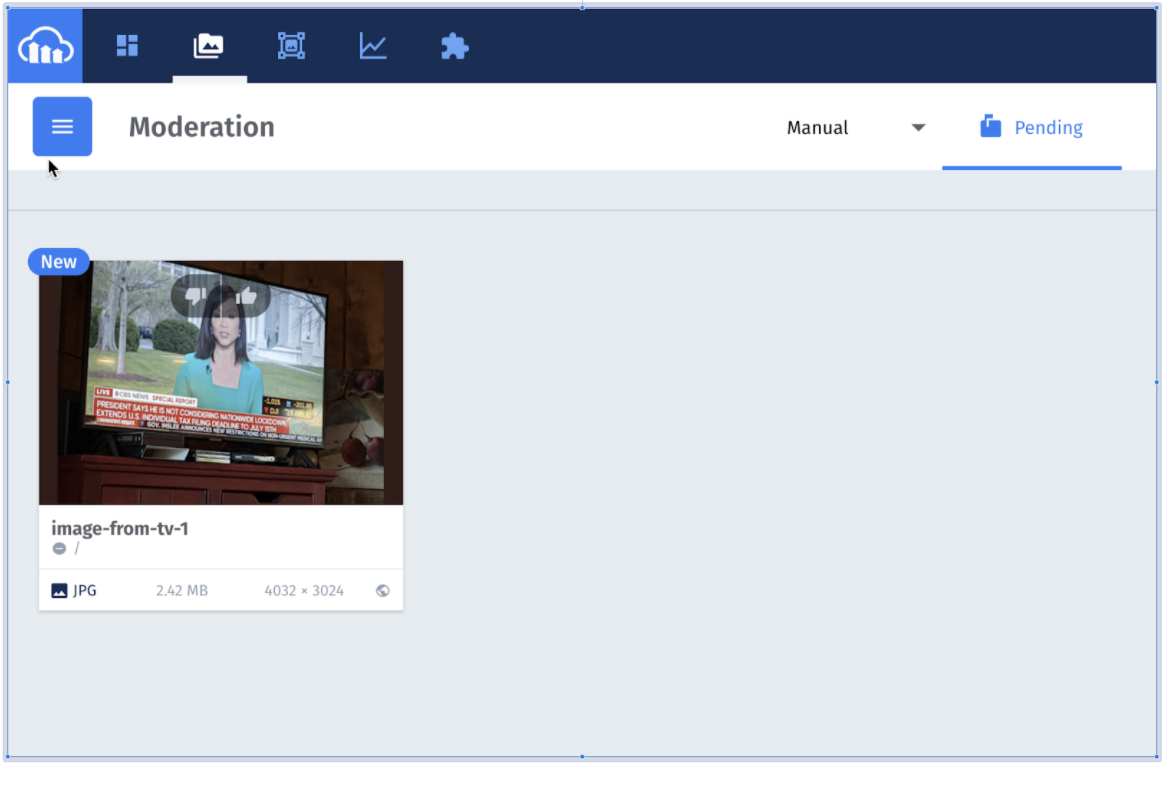
In this script we are uploading a picture of an image on TV. We use the quality_analysis option to test for blurry-ness. In the response we can test to moderate an image with a threshold quality of less than .7 where 1.0 would be 100% or the best quality. So, if the image is less than 70% we could signal that it required human moderation before moving on to the next step in the workflow pipeline.
cloudinary.uploader.upload('./assets/images/image-from-tv.jpg', {type: 'upload',public_id: 'image-from-tv-1',quality_analysis: true,invalidate: true}).then(uploadResult => {console.log(uploadResult)if (uploadResult.quality_analysis.focus < 0.7) {cloudinary.uploader.explicit(uploadResult.public_id, {type: 'upload',moderation: 'manual'})}})
If you look in the DAM, under manual moderation, you'll see that this image missed the accepted quality threshold and was place in pending moderation.
New quality moderation in Beta
If you’re a paying customer you can request to take part in the Beta. Talk to support@cloudinary.com or use this form: https://support.cloudinary.com/hc/en-us/requests/new
Exercise: Using External Data and Background Removal
We'll cover a couple of requirements in this exercise: using external data
node user-upload-workflow/bgremoval/upload-bg-removal-using-external-data.js
In the script below we've hard-coded data to mock a situation where we are fetching external data about an ecommerce item. This would come from a Project Information System. We're using this data to fill in variables in an upload. We're also making use of the Cloudinary AI Background Removal that you studied in the Fundamentals course.
Multi step process
In the first step we’ll use external data to supply public id, context and tags to an uploaded image. We’ll also request the asynchronous process for Cloudinary background removal. A webhook will let us know when this is complete.
We’ll check the webhook and apply manual moderation when background removal is complete.
Finally we’ll run a script that finds approved images and creates image tags with an alt attribute based on the external data in step 1.
1. Cloudinary Background Remove Add-on
You'll need to request the free tier Cloudinary AI Background Removal for this exercise.
Upload Script
Execute this script:
node user-upload-workflow/bgremoval/upload-bg-removal-using-external-data.js
- provide source image location
data.image, - assign public ID
public_id: data.imageId,, - set a context description that tells us what the product is and whether or not it is on sale:
context: `description=${data.description} ${data.sale ? 'on sale' : ''} | sku=${data.sku} | alt=${data.description}`,
- add a tag
tags: data.category,
const data = {sku: 's0001',category: 'shoes',description: 'Yellow Shoes',image: './assets/images/yellow-shoes.jpg',imageId: 'yellow-shoes',sale: true}cloudinary.uploader.upload(data.image, {public_id: data.imageId,context: `description=${data.description} ${data.sale ? 'on sale' : ''} | sku=${data.sku} | alt=${data.description}`,tags: data.category,background_removal: 'cloudinary_ai',notification_url:'https://webhook.site/5e96159b-630d-4fbe-91ed-d3f2807aedca',transformation: [{ height: 200, width: 200, crop: 'thumb' }]}).then(uploadResult => {console.log(JSON.stringify(uploadResult, null, 1))}).catch(error => console.error(error))
Background Removal Complete?
You can specify a webhook to detect that the background removal is complete. We're using https://webhook.site, but this could be a web api on your system that receives notification of the completion of the background removal.
You might notify people in your organization that an upload is complete and in pending status based on the webhook notification.
Check the Moderation Queue
You'll want to manage the moderation queue and this can be automated. You might run a script every hour to see if there are approved images and these could be moved down the pipeline.
node user-upload-workflow/bgremoval/check-approved-status.js
In the following script, if an image is approved, we get the publid ID and alt context value to create an image tag.
cloudinary.api.resources_by_moderation('manual', 'approved', {resource_type: 'image'}).then(result => {if (result.resources.length > 0) {for (const img of result.resources) {// create image tag with alt attribute to use once moderation is completecloudinary.api.resource(img.public_id).then(result => {// console.log(result)console.log(cloudinary.image(result.public_id, { alt: result.context.custom.alt }))}).catch(error => {console.log(error)})}} else {console.log('no images approved')}}).catch(error => {console.log(error)})